Floor Staining and Colour Matching
Floor Staining and Colour Matching
What’s Covered on This Page
- Floor Staining and Colour Matching in Auckland: Find the Colour You Really Want
- How does Floor Staining and Colour Matching work on Auckland timber floors?
- Preparing Your Auckland Floor for Staining
- What Happens When We Send Floor Staining Professionals to Your Auckland Home
- Mixing Floor Colours After Repairs or Extensions in Auckland
- Why does my stain colour look different on my Auckland floor compared to the sample swatch?
- Can you match new timber boards to my existing Auckland floor?
- How does Auckland’s humidity affect floor staining results?
- How do I prepare my home before you arrive to stain my floors?
- Is my old damaged floor still a good candidate for staining and colour matching?
- How long does floor staining take from start to finish in Auckland?
Need floor staining and colour matching?
Call now for a free estimate. Call Floor Sanding Auckland Experts now.
Floor Staining and Colour Matching in Auckland: Find the Colour You Really Want
It is easy to pick a stain sample and assume you know what colour your floor will be. However, Auckland homes have a huge range of native and imported timbers and they react in very different ways to staining. This page explains how our Floor Staining and Colour Matching process works, from the initial sample to the final coat.
How does Floor Staining and Colour Matching work on Auckland timber floors?
Different timber species absorb stain in very different ways, usually in surprising ways.
Here in Auckland we have a range of native and imported timbers, including rimu, matai, heart pine, kwila, and oak. The way each timber absorbs stain is due to a number of variables, such as grain density, tannins and the overall openness of the timber grain. Staining the same floor in an existing Ponsonby house may turn out completely different to what you expected if, instead of a rimu floor you now have an oak floor.
A lot of homeowners look for a sample they like and then are confused when the final stain turns out nothing like the sample on their boards, leading them to think that something has gone wrong with the stain or the staining process. It is not the stain that has gone wrong. It is the timber.
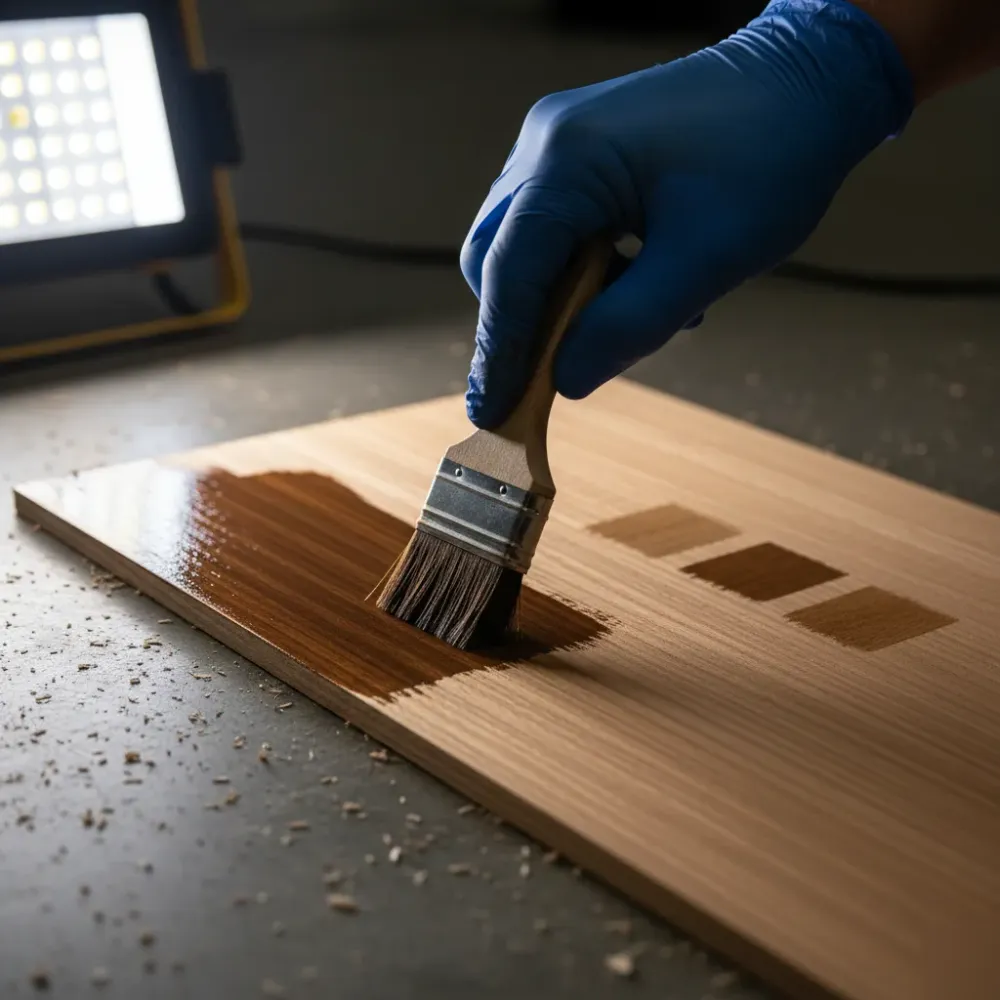
Here is what we do when we stain the floor:
We sand down a test section on the floor to reveal the raw timber. The true nature of the timber is only apparent when you can see the bare timber, before any finish, dirt, sun bleaching or previous coatings have changed the look of the timber. Then we apply two or three stain samples on top of the sanded down timber on your very own floor and let the client choose between them. We don’t use a sample board, which is a standard piece of timber that we keep for the showroom or a sample book of swatches; we apply stain to the timber where the job is.
We then wait to see how the stain will appear when dry. There has been many stories of stained flooring that looks good when wet, but then the colour changes drastically when the flooring dries. We do not rush to see which stain has been applied and wait until it has dried out fully to show the client how the stain appears, letting it cure out in the house and under Auckland conditions, since we know how humidity changes how the stain looks on the final product. Moisture content of timber in flooring directly affects the rate of staining and absorption of stain in timber floors according to the New Zealand Timber Industry Federation.
Colour matching is a much more involved process when trying to match new and old floor timbers. Perhaps your Grey Lynn home has been extended or you have new floor timbers that match where floorboards have been replaced in a kitchen. In that case the new board is usually lighter in colour and has a tighter grain and therefore will take in a much higher amount of stain when compared to the older boards. What we have done in the past to overcome this issue is to first place a diluted base colour over the new timber boards, or to layer two colours of stain over the new boards, but the problem is that there is no standard formula as it depends on the condition of the new and old boards and the existing stain.
Think the damage is too severe to be matched? It’s probably not. Nine times out of ten, with proper sanding and a good staining technique, the join between old and new timber is close enough that your eye can’t pick up the line. That’s our objective, to achieve perfection for the standing point of view.
### Choosing the correct Stain Colour for Your Auckland home
This is where people get stuck. They’ve got a lovely timber floor and are confronted with 40 different stain samples that look like each other in the lighting at the floorshop, yet look completely different when on the actual floor at home. We always advise on this aspect. The choice of stain colour needs to consider the natural light of the space, the furniture that will be in it and the timber species that it’s being applied to. A dark walnut stain can look great on a freshly sanded oak floor in a sun-drenched Ponsonby villa, but applied to rimu in a south facing room, the result might look very dark, almost black. We often hear from clients that their floor turned out much darker than they expected. Auckland’s natural light can be quite a mix, sometimes being very UV heavy or cloud cover heavy and the colour temperature changes during the course of the day. What may look golden and warm at 10am may look quite dull or flat by 4pm. This is why we don’t allow customers to pick their stain colour purely from a sample card. We stain actual test areas on their floor in their room and ask them to wait and observe the stain colour before making their final choice, to allow them to live with their options for a couple of days before finalising their decision.
The choice of timber species to stain also requires consideration that most people are not aware of. For instance, native New Zealand timbers like rimu, matai, kauri all accept a colour differently. For instance, rimu tends to be a bit redder in tone, so it tends to resist cool tones such as grey stains. Kauri accepts stains better and can take a colour more evenly, however can be quite patchy if the sanding preparation is not adequate. Pine is the most tricky species to stain. It is a soft timber that is often patchy and it grabs stain unevenly, thus requiring a pre-stain conditioner before it is stained.
If you’re struggling to decide what to go with, don’t worry. Most of our clients come in with a general idea, something like “lighter”, or something like “not too red”. From there, with a little knowledge of your timber type and what room conditions you’re staining in, we are able to present you with 5 or 6 very realistic options. No more guessing games. And lastly, don’t forget sheen, as satin hides blemishes better than gloss. Yet, a semi-gloss can make a dark stain shine in the right place, making every little decision count. When it comes to stains and flooring, getting the colour right is the best way to avoid second-guessing yourself every time you step through your front door.
Preparing Your Auckland Floor for Staining
Proper prep work is the key to getting a great stain and keeping it on for longer. It will save you having to deal with peeling within a few months. We tell all customers this same truth: 90% of a job is how the floor has been prepared prior to staining.
First things first, the room needs to be empty. Every piece of furniture, every rug and potted plant needs to be removed. I have been caught out in the past for people not taking into account felt pads left on the bottom of furniture legs, the residue from which prevents absorption by the stain. The same goes for any floor, but this is especially problematic in older homes in Grey Lynn where furniture hasn’t moved for decades. Once the floors have been cleared out, every board will be looked at to check for any visible damage. The nails are punched down if they have popped out and the spaces between floorboards are filled using a flexible filler, designed specifically to match the species of the timber. Any cracked, split or loose boards will be repaired or replaced before we continue.
The next stage is sanding. This is typically where most people get a little too ambitious and get stuck on DIY floors. It is not a case of simply renting out a sander and getting down to business. Every type of timber species in Auckland requires different grits for a sanding treatment; native rimu timber for example works differently from pine or engineered oak floors. First up is a much coarser grit which will allow for the removal of any old finishes as well as bringing the surface up flat. As we progress to a finer grit the timber becomes smooth to the touch and the finer grains are worked through. Sanding the wood on the final pass is really important as any scratch patterns from this process will appear through the stain. According to the New Zealand Timber Industry Federation, proper sanding preparation is the most important factor for how well a stain will adhere to floors in addition to achieving the colour of the customer’s vision.
After the sanding, dust is your number one enemy. We will vacuum the whole floor, then use a tack cloth to wipe the dust away. Even the smallest particles on the grain of the timber can result in patches in the stain colour. Finally, the ambient temperature and humidity are also monitored in the house to prepare it for a staining job, given that Auckland has a very changeable humidity level due to its coastal climate. Staining a wet floor will only lead to further complications further down the track.
If your floors are not as straight forward as it sounds and you aren’t sure if a full sand is required or just a light buff, this is something that we deal with every day. We come in to view what you are dealing with on site to give you a recommendation as to how you may best proceed. Many floors, in particularly good condition, will need only to be screened and recoated prior to a staining application so that it is a minimal disruption for your home.
Need help with floor staining and colour matching?
Call now for a free estimate. Floor Sanding Auckland Experts is ready to help.
What Happens When We Send Floor Staining Professionals to Your Auckland Home
We start with a walk through of the whole floor with you. We walk through each and every area. We look at the type of timber in the floor. We look at the existing finish on it. We check if there are repairs to be done. We note the natural lighting patterns in each room. This initial walkthrough is more important than a majority of people realise.
We cover the area around you with a plastic covering before doing anything. This is done before any actual work on your floor begins. We protect door frames and skirting boards and kitchen cabinets from any mess. Stain will be as messy as possible if you let it. Since we do floor staining work in Auckland for more than 15 years, our preparation work is half the job.
Once we’ve covered the area around you, we start sanding the floors. We use a dust containment system to keep the house usable. Most people think that floor sanding will make their house messy again but this isn’t the case anymore. Floor sanding opens up the pores of your timber, allowing the stain to seep in evenly. It also helps remove layers of old stain that are there on the surface. Some older villas in the suburbs of Ponsonby have three or four layers of finish. These layers have built up over decades. We’ll have to remove all of them in one go to get them all.
Once the sanding is done, we’ll put down stain test patches. This is how we make sure that the colour looks perfect. We’ll apply two or three stain options. We won’t apply it to a sample board; instead, you’ll get to see how it will actually look with your wood. It makes for quite a contrast compared to a shop visit.
These test patches will dry completely before we let you make a decision. A stain colour might appear different when it’s still wet. It will dry completely differently once it has fully cured. This is why we wait until it dries, and also talk to you on the colour choices. You might see different tones of the colour as you compare it to each other, and it all depends on the grain and the species of your timber.
Once you’ve selected the colour, we apply the stain in controlled, even coats. We’ll do it section by section so you don’t have any overlap issues with the stain. The entire area is treated as a single patch for stain application. This means you can’t have stains where one room ends and another room starts. Want to see how your floor might look? Call us for details.
We’ll talk to you about drying time and other things before we leave that day. You’ll know exactly how long you need to keep out of the floor. You can know when you can move your furniture around again as well as when you can walk on it again.
Watch Our Video
See How We Handle Floor Staining and Colour Matching in
Floor Sanding Auckland Experts
Mixing Floor Colours After Repairs or Extensions in Auckland
You have just built a new room. Or maybe water damage has been repaired in the hallway. Either way, the new timber looks quite different from the existing house. This is disappointing. We often field phone calls with this very same issue.

Most people do not realise this, but your current floor has changed colour since the day of installation. Daylight, daily wear and tear, cleaning chemicals, and even the humidity in your Auckland home has all changed its colour. So we can’t colour match a new section to the original colour of the stain. We have to match to what is there now.
Our method here is quite specific. We will sand a sample area on the current floor to see what the timber colour is beneath. We sand the same on the new boards. Most times, what we find is different timber species beneath. This may surprise the owner. A rimu floor from the 1960s will never match a timber supplied now. And when we add engineered boards to a home in Grey Lynn or Ponsonby, they don’t necessarily match an original heart matai floor.
That’s where we start. We make colours to match on the spot. We don’t choose from a paint shop wall. We work on your current floor to match to the new. We test different colours until it looks right. And when a villa is added onto, in a suburb such as Grey Lynn or Ponsonby, we regularly mix colours to match. And we don’t make a perfect blend. We just make it blend as much as you can get it to.
We also check the colours at various light conditions. Under downlights, a floor may look right. Under the afternoon sun it looks wrong. So we look at your test patches in different lighting conditions first and ask you to look at them too. You are the one who has to live with this flooring.
Are your repairs or extensions looking like they need help? Give us a call. It’s a brief conversation. We can often give you an idea of the project even before we come and meet you.
We will often ask owners whose current floor has never been recoated to re-coat the whole floor. This will help the new section blend in. And the old floors will be freshened up. So the new floors blend in. The whole floor will look better from the doorway all the way back in the house.
Frequently Asked Questions
Common questions about floor staining and colour matching services
Why does my stain colour look different on my Auckland floor compared to the sample swatch?
The sample swatch and your actual floor are two completely different things. Every timber species absorbs stain at a different rate. Rimu, matai, pine, and oak all behave differently. Your room’s light also shifts the colour throughout the day. Auckland’s mix of strong UV and cloud cover changes how warm or cool a stain appears. This is why we apply test patches directly on your floor and ask you to live with them for a day before deciding.
Can you match new timber boards to my existing Auckland floor?
Yes, colour matching old and new boards is something we do regularly across Auckland. New timber is usually lighter with a tighter grain, so it absorbs stain faster. We adjust by pre-treating new boards with a diluted base coat or layering two stain tones to bridge the gap. In most cases, once the work is done, your eye cannot pick out the join. It takes extra steps, but a clean blend is achievable on most floors.
How does Auckland’s humidity affect floor staining results?
Auckland’s humidity directly affects how stain bonds to timber fibres. High moisture content in the wood slows absorption and can cause uneven pigment distribution. This is why we always check timber moisture levels before starting. We also allow each test patch to cure under your home’s natural conditions before committing to a colour. Rushing this step is one of the most common reasons floors end up looking wrong once they dry.
How do I prepare my home before you arrive to stain my floors?
Clear everything off the floor before we arrive. That means furniture, rugs, and plant pots. Do not forget felt pads stuck under chair legs. These leave adhesive residue that blocks stain absorption. The floor needs to be completely bare so we can inspect every board, punch down loose nails, and fill gaps before sanding begins. Good preparation is what separates a stain that lasts years from one that starts peeling within months.
Is my old damaged floor still a good candidate for staining and colour matching?
In most cases, yes. Nine times out of ten, proper sanding and the right stain technique bring even heavily worn floors back to life. Old finishes, sun damage, and previous coatings hide what the timber really looks like underneath. Once we sand down to bare wood, the true grain is revealed and we can work with it accurately. Floors that look too far gone on the surface are often very workable once the prep is done properly.
How long does floor staining take from start to finish in Auckland?
The timeline depends on the size of your floor and how complex the colour matching is. Test patches need time to cure before you choose a final colour, which usually adds a day to the process. After staining, each coat needs to dry fully before the next is applied. Auckland’s humidity can slow drying times slightly. Most residential floor staining jobs are completed within two to four days, including prep, staining, and final coats.
Ready to Get Started?
Call now for a free estimate Call 09 888 0793 today.